

Moving Images on the Mat
There are several reasons you might want to change where your image cuts on a mat. Design Space defaults to the upper left corner when images are sent to the mat. If you cut there every time, the corner of the mat will wear out more quickly. Changing where you cut on the mat will help mats last longer and maintain their stickiness.

The top of the mat tends to lose it stickiness first and the weight of the mat can cause cardstock to pop up. Also, when a cut is at the very top of a mat, the mat hasn’t fed far enough into the machine for the rollers to help hold the cardstock down. This can be especially problematic with images that have a long horizontal cut at the top, and so I move this type of image down towards the bottom of the mat.
After clicking “Make It,” select the mat where you want to move images, then select and move the images you want to reposition.

I save all but the smallest of scraps, and I can move my images around on the prepare screen to cut my images exactly where I want to on the mat. I will often place several scraps on one mat and match my image positions to the position of the scraps on the mat.


I could combine all my images on to one mat in Design Space, but it’s easier for me to keep up with things this way. I just eject and reload the mat after each cut.
You can also rotate your image in the Prepare screen. This is helpful when moving images between mats.


Hiding Images on the Mat
Sometimes things happen and images need to be cut again. I’ll often change my mind about a color, forget to change my setting, or glue a layer to the wrong side. I could go back to the design screen and hide things I don’t need to cut, but I’ll have to hunt for them and remember to go back and unhide those items later.
In the prepare screen, select the image.

Click on the three dots and click “Hide selected.”

The image is now hidden and won’t cut.

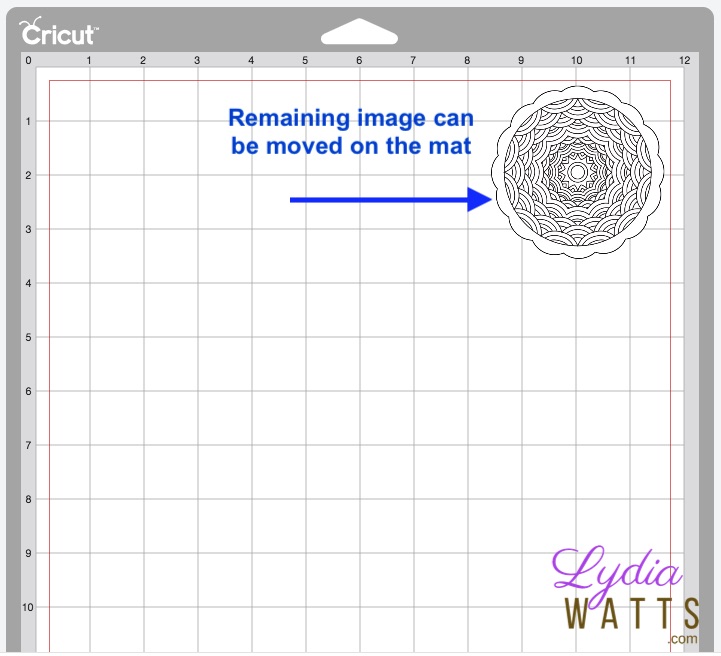
The image still on the mat can be moved to a different spot.
If you hide all the images on the mat, the mat will eliminated and it won’t appear on the cut screen.


This short video demonstrates moving and hiding images on the Prepare screen:

11 thoughts on “Moving and Hiding Images on the Mat”